Sunday 22 December 2013

Battle of Leipzig Novel: 1813 Kriegsfeuer by Sabine Ebert

As I've previously mentioned, my partner is German and a native of Leipzig (or Markkleeberg to be precise), and her mother has just sent us this new novel about the 1813 campaign. It was written to commemorate the 200th anniversary of the Battle of Nations. Unfortunately it is only available in German as far as I am aware. My partner has promised to tell me anything she thinks I might be interested in, but I really hope an English translation will be made! You can read more about it and the author Sabine Ebert at her website, using google translate if you don't read German.


Even if I can't read the novel, I can still understand the interesting maps it comes with, as I'm sure learned readers of this blog will also! Here's the map from the inside front cover...

...and here's the map from the inside back cover. Nice huh!

The dust jacket has this period painting on one side...

...and opens out into this map of Europe in the time of Napoleon, with significant battles indicated:

With all those maps provided, I REALLY wish I could read this! I should have paid more attention in German classes at school! 

One of the problems of being in an English language country is that there are thousands of books about Waterloo and very few about the more interesting (in my opinion) earlier continental campaigns. I've just picked up a copy of David Chandlers "Campaigns of Napoleon" so that will have to do in the meantime.

Of course on the subject of the Battle of Leipzig, if you haven't already had a look then check the New Zealand wargaming refight that we put on earlier this year, and this post of useful links about the Battle of Leipzig.

Saturday 30 November 2013

French Voltigeurs 28mm Perry

Voltigeurs. These are more Perry plastics, based to be used as skirmish elements in Lasalle or whatever other rules I use. Like many wargamers before me I found myself cursing the intricacies of the French infantry uniforms. These uniforms are the basic troops so you need thousands! I ended up going with something of a simplification and even that was bad enough. At least some of the Perry line infantry are in great coats... except that I'm fussy and don't like the great coats so I will do them separately as conscripts or something.

Naturally as soon as I'd finished the white I found myself thinking that maybe I should have done some in blue as Legere, but oh well, now I have plenty of Voltigeurs!


And a photo of all of the voltigeurs I've painted up thus far.


I'm also facing a conundrum with the rest of my line infantry, as they are currently based up 4 to a 50mm square base, as used by some other locals. However the more I look at them, the more I want to do them 6 to a base. This would mean much difficult rebasing and painting many more infantry.... Le Sigh.

Thursday 14 November 2013

French Guard Artillery 28mm Perry

A couple of French Guard 12 pounders. Figures from Perry again.  Almost need to be on bigger bases(?), but I wanted to keep the basing the same as the other artillery at this stage, hence squeezing everyone onto 50mm x 75mm bases!  Still working on a better lighting setup for photography, but that will be sometime in the future. In the meantime, please note the blue is not really that bright in real life!

Reserve artillery was more likely to be committed in a battle than other Guard troops as I understand it, hence these are the first Guard units I've painted up (excepting many in 1/72nd scale decades ago!).


Monday 11 November 2013

French Line Artillery 28mm Perry

Six line artillery for the French. These are more metal figures from Perry. Four 6 pounders and two howitzers. Two of the 6 pounders were from Limber packs, and I'm using an extra pack of artillery crewmen, and the "infantry drafted to help" pack, to make the overall look a bit more interesting. I still have 4 figures left over from these supplementary packs.

I was originally waiting for Victrix to release their supposed plastic French arty, but got sick of waiting and decided to make a start on these instead. I might add some more pieces from Victrix should their plastic set ever eventuate...


The front and centre gun below has a wounded officer and two drafted infantry.

The closest gun below has two gunners with trail spikes, and another reaching for the ammunition box.

Saturday 2 November 2013

Reinforcements - Austrians

I decided to pick up some Perry Austrians just before the recent price increase - this lot should keep me busy for a while! 8 infantry boxes plus some extra command sprues, 8 Line Artillery, 6 Cavalry Guns, 36 Hussars, Generals and a few other bits and pieces. Perry have just released their Austrian Cuirassiers so I'll get some of those too, and I also want some Uhlans and Jaegers but they don't make these yet.  As for my French I'm planning basic organisation around Lasalle lists, but able to be used for Blackpowder or whatever other Napoleonic rules we end up using.

Here's one of the Austrian Limbers - how the heck do those 4 little bits, and the cross beam above them go together? Time to ask the knowledgeable folks at TMP I think... or please comment below if you have any helpful ideas or links!

Also picked up some French Dragoons to round out my French cavalry! That will make 12 regiments of French cavalry, and might allow myself a couple of Guard regiments once those are done!

And now for something completely different...

WARNING: Those with particularly delicate historical sensitivities should perhaps ignore the rest of this post and divert to the Southern Strategists blog to see some historical demo games! :) These demo games were lovely by the way, and included General de Brigade Seven Years War, Pike and Shot English Civil War,  Bolt Action Pacific WW2,  a modern skirmish game, and also a 15mm Napoleon at War game on the second day. 

This time of year is the annual Conquest Tournament here in New Zealand. I was planning on spectating  this year, but got a last minute request from my mate Damon umpiring the Warhammer Fantasy Battle (WFB) competition, asking if I could join and even up the numbers...  He seemed happy with my mad proposal to use Napoleonic cavalry as a WFB Empire army, as it would eliminate players having byes in the competition. By coincidence the basing favoured by many 28mm Napoleonic players in New Zealand also matches WFB.

The Empire army in WFB is loosely based upon Renaissance Germany. However, my proxied Napoleonic troops were recognised easily enough by my opponents after a few words of clarification at the start of each game.  I used Cuirassiers for Knights, Carabiniers for Reiksguard (elite knights), Hussars as Pistoliers (light cavalry), and Artillery as Artillery. I quickly converted two spare Chasseur eagle bearers to an Army Standard Bearer and Wizard and I was ready! 

For those unfamiliar with WFB, the rules have a Donald Featherstonian feel, with saving throws, individual casualties and so on. I wouldn't want to use this sort of clunky system for large battle historical games anymore, but it still suits "heroic fantasy" style gaming I think. It also reminds me of playing Featherstone rules with Napoleonics many years ago - albeit considerably refined and thus without all the confusion!

Here's the Army Standard Bearer and Wizard I converted from spare Chasseurs. For the Wizard I vaguely had in mind real Napoleonic "wizards" like Murat, with outlandish ostrich feathers and divine powers of battle!

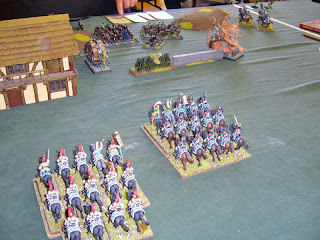
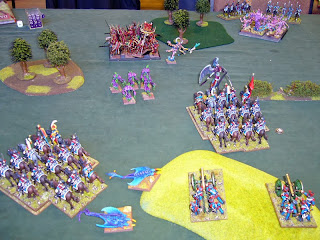
Game 1, fighting some Dark Elves who arrived with a couple of monstrous Hydra (top left). Hydras are scary but they don't like dodging 6-pounder cannon balls. Neither did their big cauldron on a wagon thing. Take that Elves. 17-3 to me. 

Game 2, against Chaos. I didn't think this was going very well, but then my opponent Al announced he had lost too many banners plus his general, so it turned out to be 11-9 to me.

Game 3, against Skaven (ratmen). My cavalry were riding down the ratmen like, well rats. Unfortunately the victory conditions in this game prioritised holding that building on the left. Cavalry can't take buildings easily and I had no infantry, so the game ended up 11-9 to my opponent (another Mark).

Game 4, against Daemons. The left artillery piece is about to obliterate those giant blue stingrays with grapeshot, very satisfying! Also many Daemons were blowing themselves up randomly and disappearing - I didn't understand why but I didn't complain! 11-9 to me or my opponent, can't remember which.

Game 5, against Skaven again.  The 5th Hussars have got a little too close to a very bad big pink Abomination and are about to rout again, demonstrating their consistency across rule sets. If I recall correctly this was a solid win to the Skaven 16-4. Incidentally this photo also shows my entire army, of three large heavy cavalry units, three small light cavalry units, 2 artillery, and four characters in the cavalry units.

Happy to report all the Fantasy players were very tolerant of my 'Fantasy' army. I ended up coming 11th out of 24 players. Thanks also to Darren who helped me sort out an army list for the tournament.

Right, back to regular Napoleonics in the next post, as a large bundle of reinforcements have arrived in the post!

Friday 18 October 2013

Battle of Leipzig 1813-2013: Some Links

For my own reference I've been collecting some links from the 200th anniversary commemorations of the Battle of Nations at Leipzig in Saxony, and I'm sharing them here for others who may be interested. There are some general links to events  in Leipzig itself, and of course plenty of miniatures and wargaming links given the focus of this blog. I know there are more events to come, which I will add as I become aware of them, so check back for updates. Also, please feel free to add more relevant links in the comments section below - thanks!

General Links

The Battle of Nations at Leipzig was the largest battle in history up until the 20th century. It involved coalitions of  French, Polish, Italian and Confederation of the Rhine forces on one side, and Russian, Prussian, Austrian and Swedish forces on the other. 600,000 troops were involved, with approximately 100,000 casualties. This was also a battle of ideas and ideals that had been spreading since the French Revolution and would continue to spread afterwards. Both between and within the coalitions involved, cultural justification systems of meritocracy, reason, and autonomy vied with aristocracy, superstition and tyranny.  This Battle of Leipzig Wikipedia link is probably a good place to start as a source of information.

Much of the commemoration information from Leipzig itself is in German, which I don't speak unfortunately. However my partner does and in fact she is a native of Leipzig, or more specifically the town of Markkleeberg, which has been very helpful!


First off then, here is the official website of the commemoration, with information about associated activities occurring in and around Leipzig. It also has an English language version.


Second, below is the newly constructed "Leipzig 1813", 360 degree panorama by Yadegar Asisi. It's beautiful and amazing.  My partner tells me this has been constructed inside an old East German industrial storage tank. There's also a video about the construction of it.

Here's a video on the enormous monument to the Battle of the Nations in Leipzig. It is also the 100th anniversary of its completed construction. There is also this panorama view of the interior that you can scroll around.

The astounding "History in Miniatures" or Geschichte in Miniaturen site containing huge dioramas of battles of the Leipzig campaign. These include many thousands of miniature figurines. There's also a book available of the dioramas.


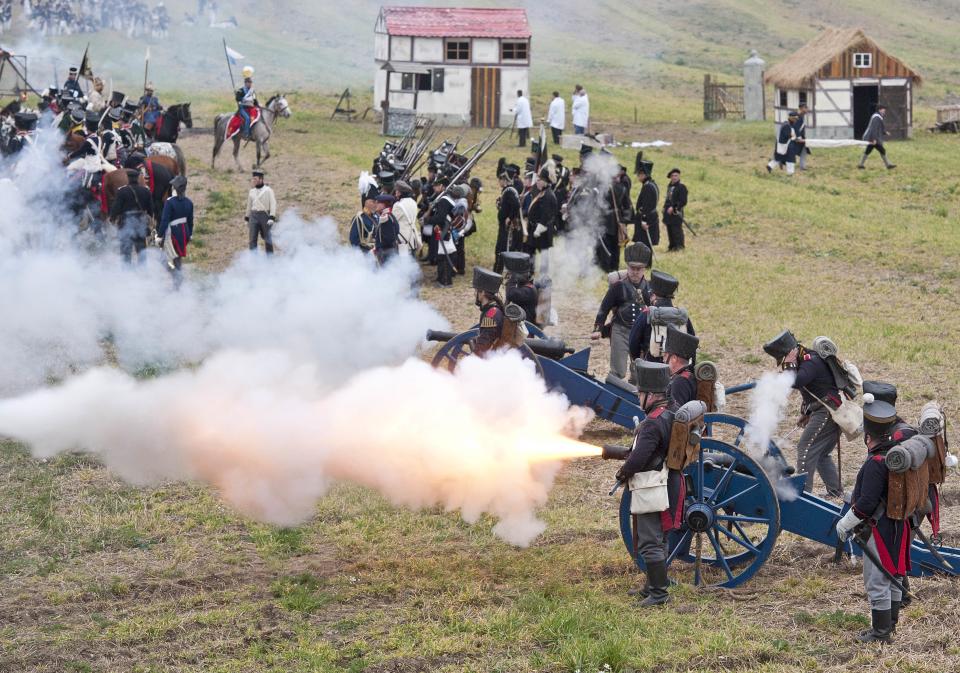
NEW 19.10.2013: The reenactors are starting to arrive in Leipzig, 6000 of them in period costume. Some great pics at the the Spiegal website, especially of the Saxons of course! Another update with gallery here.


Even a model village with buildings of the period is being constructed for the event. 

NEW 21.10.2013: The BBC has a story on the activities and a photo gallery with some excellent pictures. The Polish Lancers in the second picture look quite stunning - and good to see the BBC has corrected the caption to state they fought with Napoleon (and were some of his most loyal and determined troops too, as they saw in him their best chance for eventual autonomy from Russia and Prussia).   

The BBC also reports some unfortunate remarks from church representatives, who again seem unable to distinguish fantasy from reality, nor deal with complexity, and claim the event glorifies the carnage of war. The statement expressed by one of the actual re-enactment organisers though:
...the re-enactment is dedicated to the "reconciliation" of people, said Michel Kothe, a member of the Battle of the Nations Association which is organising the event. "Contrary to what happened at the time, people from 28 nations will peacefully camp together before the battle," he said.
Exactly - the contrast between Europe now (Nobel Peace Prize 2012) and 100 years ago (World War 1) and 200 years ago (Battle of Nations) is a vital insight into how far humanity has come. I think such events (and wargames too) are one of the most effective ways of making us aware of the historical pattern of decreasing violence - that we should all recognise, be grateful for, and seek to continue. As a psychologist I recommend Steven Pinkers excellent book "The Better Angels of Our Nature: Why Violence Has Declined" for a detailed empirical analysis of this phenomenon.

There's also this gallery from Yahoo News, this gallery from CBC news, and this gallery from The Daily Mail. Some pictures in these galleries overlap, but not all.


NEW 10.11.2013:  Another two blogs with some fantastic galleries of French and Polish re-enactors. See them here at the Der Letze Mohikaner blog, and Firguren und Geschichten blog respectively.


NEW 27:12.2013: Horse and Musket Blog has some good photos of the Ingolstadt Bavarian Army Museum Battle of Leipzig Diorama.

Wargaming Links

Firstly here's our own  28mm commemoration refight of the 16th of October 1813 battle, that took place here in New Zealand. Some videos of the event have also being added, and here you can see part 1.

A lovely looking 28mm refight of the Southern Sector on the 16th, by Australian NSW wargamers.

Rafael Pardo's fantastic "Project Leipzig" blog, has an enormous amount of information that I've only just begun to explore, including this impressive list of scenarios.

James Fisher's http://waterloo2015.blogspot.com.au also has a list of bicentennial games listed.

The Avon Napoleonic Fellowship has a growing list of their Napoleonic bicentennial events including from the Leipzig campaign.

Liphook wargames club has an album of photos of their refight in 28mm scale.

Gonsalvo's blog has refights of the 1813 Battle of Dresden and Battle of Mockern, and more material on the 1813 campaign.

Will McNally's blog has a refight in 1/72nd scale here in part 1 and part 2.

Caliban's blog has a refight in 15mm scale.

The largest cavalry battle in history, here's Liebertwolkwitz refought in 6mm scale at the Pushing Tin blog. 

RTB at Large's blog has this hypothetical Leipzig refight scenario in 28mm.

Another hypothetical Hamburg refight scenario on Les Rifleman's blog.

The Campaign of Nations blog has a post-armistice 1813 fictitious campaign.

Roll for Reserves blog has a commemorative game based on the Leipzig campaign.

Metro East Gaming Association has a wonderful site with galleries of photos of their huge Leipzig refight.

Glenn's site has a Leipzig refight from Historicon 2014.

HMGS South group played a southern sector Leipzig Probstheyda battle in 2014. 

The Wargames Holiday Centre in the UK has also been uploading pictures and videos of their 2013 refights of Leipzig campaign. Here's the first  photo gallery. Hopefully they sort out their labelling a little better on some of the latest videos, but you can find more videos here.
Well that's just a start, once again, if you have further relevant links of 200th anniversary commemoration events (or other Leipzig relevant information), then please add them in the comments section below. Thanks!

Friday 11 October 2013

Project Leipzig – Blackpowder rule changes and interpretations

As requested, below are set out the key rule interpretations and changes to the Black Powder rules (published by Warlord Games), that our group used for Project Leipzig 2013.


Woods (p.36, Black Powder)
We have adjusted the Black Powder rules around woods to something that works:
  • infantry halve their movement (i.e. 6”) in woods and otherwise maintain a regular formation (i.e., do not go into skirmish formation, but feel free to have your units look a little irregular);
  • infantry with the skirmishing ability can chose to deploy as skirmishers in woods and move normally  i.e. 12”);
  •  shooting is restricted to 6” in woods and all enemy count as not clear;
  •  infantry in woods do not get the +1 close range or closing fire bonus for shooting.
  • skirmishing infantry do count their normal +1 bonus for being skirmishers;
  • skirmishers in woods can fight in hand-to-hand and do not suffer the -1 to hit as skirmishers;
  • any unit that falls back as a result of a combat in woods falls back the full distance (i.e., 12”).


Shooting (p.40 Black Powder)
We play that units which have moved three times with a single order (or a follow me move) cannot shoot.  They were far too busy moving.

Visibility (p.45 Black Powder)
We play that all units need a gap of at least 6” to shoot through.  Its just simpler that way.

Disorder (p.48-49 Black Powder)
We play that disordered light cavalry (“Marauders”) may rally back a full move to recover from disorder (instead of spending the turn being unable to move). This move must take place within the rear quarter of the cavalry.

Enfilading a Target (p.49 Black Powder)
We play that only fully formed troops can enfilade a target – skirmishers cannot enfilade, nor can units in buildings or villages. In addition, traversing fire cannot be enfilading fire.

Charges – interpenetration (p.57 Black Powder)
We play that the final move of a charge cannot involve interpenetration. Thus a charge made with an initiative move cannot move through a friendly unit. However, a unit that would otherwise need to interpenetrate a friend in a charge may move up to get into position to do a final charge move (this should be specified in an order), and then charge home – but this would require at least two moves.

Skirmishers do not create an impediment to charges and can be interpenetrated in the final charge move.

Charges and the Follow Me order (p.59 Black Powder)
Black Powder is clear that charging units, including with a follow-me order, can only charge the flank or rear of an enemy if they start their turn in the flank or rear.  Otherwise a unit gets into position to charge a flank or rear in a subsequent turn and stops at a suitable distance.

Charges – How many units can contact an enemy? (p.60 Black Powder, & Albion Triumphant)
For Project Leipzig we expect a variation in basing styles.  This requires a sensible and gentlemanly approach that assumes a charger typically only contacts one enemy unit, with a maximum of one unit contacting each flank.  When minor overlaps take place, simply move the offending unit 1” away from the combat to show it is not involved.

There are three key exceptions to this practice:

(1)  Two infantry attack columns charge an infantry line
A reasonably common occurrence is for two infantry columns to charge an infantry unit in line.  Albion Triumphant adds the following useful (and balancing) rule, which we play:

Infantry battalions can bring into contact as many units as the rules on page 60 of Black Powder allow against an enemy formation. However, only one battalion per facing can fight, being the owning player’s choice, the other battalions being eligible as supports.

The unit chosen to fight does so with the following rules, to represent the column needing to make a quick breakthrough.

If the column defeats the enemy in the first round of combat and they flee and retire, it can be interpreted that the enemy turned just prior to contact or after a brief bayonet fight. If this happens, the other battalions in contact with the enemy get all the post melee options that the victorious battalion gets.

If nobody breaks or retires then in the second and subsequent rounds of combat, normal combat modifiers apply; but the attack column does not get its +1 morale save for the column formation as its morale is waning. This represents the column running out of steam and the enthusiasm of the troops rapidly evaporating, whilst the battalion commanders are urging a formation change to line.

Note – we also play that attack columns lose their +1 morale save in the second or subsequent round of any combat, such as if in hand to hand with another column or artillery (god forbid such a combat goes longer than a turn!).

(2)  Charging unit contacts two or more enemy in the flank
Black Powder allows a charging unit to contact more than one enemy unit in certain circumstances.  They key rule is that half or more of the second unit’s frontage must be contacted by the charger.  This will not happen very often in Project Leipzig because there are no small or large units.  But it is nevertheless possible for a unit to charge the narrow flank of up to three enemy units (see third diagram on p.60, or p.64).

(3)  Charging artillery batteries
Because we model artillery batteries with 2 or 3 guns (rather than the 1 gun suggested in Black Powder), it is almost impossible to produce the situation described at p.60, where a charged battery draws an immediately adjacent unit into the combat.  This places artillery at a minor disadvantage and does not allow the common practice of deploying an infantry of cavalry unit on the flank of a battery to protect it.

We therefore imagine that the contacted battery is 1 gun wide (about 2”), and wisely assess the situation of adjacent units.  If there would have been a substantive overlap (i.e., half or more of the neighbouring unit), then one adjacent unit to the battery should be drawn into the combat (at the charger’s choice).  This additional unit will then get normal charge responses allowed (i.e., counter-charging if Cavalry, firing closing fire if infantry or artillery, evading if cavalry or horse artillery, etc.).

This generally means that a charging cavalry unit will overlap with all adjacent units, including infantry in column or in line, another battery, or an adjacent cavalry unit.  However, a charging infantry unit in attack column will not create a sufficient overlap if the adjacent unit is cavalry or an infantry unit in line; but it will overlap with an adjacent battery or an adjacent infantry column.  Remember too that closing fire from two units at a single charging unit is as not clear.

Even then, one situation arises that is not clearly catered for in Black Powder, and for which we play a specific rules modification: in the event a battery with an adjacent infantry unit is charged by cavalry, the defending player declares whether he wishes the artillery crew to i) stand by their guns or ii) run away!  This is done at the same time as closing fire – that is, immediately after the charge is declared, and before the enemy moves any other units.

-          Stand by your guns!  If the artillery chooses to remain in place by their guns, the defending player rolls for the adjacent infantry to turn into square as normal.  If successful (or if the infantry is already in square) the cavalry charges home on the guns while the square is moved back 1” from the combat to make it obvious it is not involved.  The battery fires closing fire and fights the cavalry as normal.

If the square is not successfully formed or is disordered (or shaken), the charging cavalry contacts and fights both the square and the battery (taking closing fire from the battery as if a not clear target).

-        Run away!  If the artillery crew chose to evade, the defending player rolls to form a square as normal.  If a square is successfully formed (or if the infantry was already in a square) the defending player then rolls a single dice for the battery.  On a 3+ the crew have successfully escaped by running into the protection of the square (or a 4+ if the cavalry charged with an initiative move).  The battery stays where it is (we only imagine the crew abandoning their guns) and the cavalry halts 3” away from the square and the battery.  The cavalry player then, as normal, uses “whatever move remains to ride his cavalry back, or around the side of the enemy, as he wishes” (p.75).  The battery counts as disordered.

If the artillery does not succeed in running away, it fights the cavalry as normal without the battery firing defensive fire.  If the cavalry wins and is not disordered or shaken, it may make a sweeping advance.

Horse artillery can of course evade as normal.  And note that a disordered or shaken battery may only stand by their guns.  Thus a battery that successfully runs away from a charge (and returns to their guns disordered) can be charged again in the same turn by another enemy unit if there is room.

Infantry Skirmishers Evading Cavalry (p.63 Black Powder)
We play that infantry skirmishers charged by cavalry can evade a full move (12”) if the move takes them into terrain cavalry cannot enter (i.e., a wood, an unoccupied village) or safely behind friendly troops. Remember skirmishers may not fire closing fire (p.51).  Thus léger or jager battalions in skirmish order who stray too far from “safe” terrain or friends are at risk of being ridden down by enemy cavalry (and remember too, skirmishers fight at -1 to hit).

After evading the cavalry, infantry skirmishers are disordered.  This is an exception as evades do not normally disorder the evader, unless they also needed to change formation such as when cavalry in march column forms into skirmish order to evade. 

If infantry skirmishers successfully evade enemy cavalry, we allow the cavalry to complete its final charge move into a new enemy unit, if it has sufficient charge range and had received an appropriate order.  A typical order may be: “Charge into contact with the nearest enemy.  The newly charged unit is allowed all normal responses – this is not a sweeping advance.

If the charging cavalry had an order that specified it would only charge the skirmishers, it stops where it first contacted the enemy unit whether the unit evaded or not.

Break Tests for Closing Fire (p.70 Black Powder)
Contrary to the Quick Reference Sheet (p.184), a charging unit does not require a Break Test if they suffer a single hit from artillery closing fire.  A test is only required if the charging unit is shaken by closing fire.

However, we play that a break test is required by “Stamina 4” units (i.e. Guards or Grenadiers) if the unit takes 3 casualties while charging a battery.

Supporting Units See Friends Break from Hand-to-Hand (p.71 Black Powder)
The existing break test for seeing friends break is too random and harsh (especially for artillery).
We play that supporting units who see friends break read the result from the Shooting Break Test line (rather than Hand-to-Hand results).

We also modify this test by +1 to the dice for each point of Stamina the testing unit has (i.e., a fresh Stamina 3 unit will test at +3 if a friend it is supporting breaks).

Moving squares (p.74 Black Powder)
We play that a square cannot move or change formation if an enemy cavalry unit is within 12” and is able to charge the square.  We found pinning squares by cavalry too prohibitive and decided to exclude cavalry that is unable to contact the square because of intervening friendly (or enemy) troops, not having room to charge home, or because they would start a charge facing the wrong direction and thus be unable to charge home – cavalry commanders thus need to be more proactive in their deployment to pin enemy squares!

Cavalry riding past squares (p.74 Black Powder)
The Black Powder rules are not clear when allowing a charging cavalry unit that has halted 3” from a newly formed square to use “whatever move remains to ride his cavalry back, or around the side of the enemy, as he wishes”.  We play that the cavalry can use both the balance of its final charge move and any additional movement it may have from a successful 2 or 3-move order.  However, the cavalry may not charge another enemy formation as its “final charge move” is considered to have been completed.

While cavalry can pass through any gap on the side of a square (we do not allow players to form a “wall” of squares impassable to cavalry), it must have sufficient space to deploy on the other side (or beside) the square outside the required 3” gap.  The cavalry must also have sufficient space to move as a completed unit for the balance of its move, if any (i.e., no more clever “flowing past” enemy units!).

Infantry of 1813 – forming square and mixed formation (pp.74, 78)
Reflecting the poor quality of most infantry in 1813, any infantry unit in line or march column that is charged by cavalry that began its move within 12”, may not form square and is automatically disordered when the cavalry contacts.  This rule does not apply to Grenadier or Guard infantry units, except the French Young Guard who had plenty of élan but not so much drill.

French Provisional infantry and Prussian Landwehr in line or march column may not form into square at any time if charged by cavalry.

French Provisional infantry and Prussian Landwehr may not use mixed formation (p.78).

Villages (in addition to buildings, p.77, Black Powder)
The battle of Leipzig saw bloody street fighting for control of villages. A problem in Black Powder is that fighting for buildings is usually indecisive and results in few casualties. These village rules overrule the section on ‘Fighting for Buildings’, except for specific buildings (and defensive works) on the Leipzig board that will be identified to players before the game:

  • village comprises a base area of around 8” x 8” or so, modelled with houses, hedges, walls, streets, etc., but with ability to re-arrange buildings as required to fit troops. Larger villages can be made up of two or more “bases”, so it is possible for the French to occupy one part of a village while the Allies hold out in another.
  • Only one infantry unit can occupy a village “base”. Limbered artillery and other troops in March Column can pass through a village but may not end their move there.
  • Villages are hard cover (+2 morale save) against shooting. A unit occupying a village may shoot 2 dice from each face of the village, up to their shooting value (they may not shoot enfilading fire however).
  • Units attacking a village (only one unit per face) do not receive the normal +1 charge bonus, and do not get +1 to morale saves for being in attack column (the village breaks up formations and impetus).
  • Defending units fight with all their combat dice and get +1 to morale saves against hits in hand to hand.
  • Defenders in a village can both offer and receive support for combat results, as can attackers receive support.
  • Defenders who roll a break test use the normal results (i.e. can retire).
  • Fire! At Leipzig, parts of the villages caught fire. At the end of a hand-to-hand combat the defeated side rolls a dice – on a 6, the village has caught fire. At the start of every turn, a unit in a burning village must take a break test (using the shooting results table and adding +1 for every point of stamina a unit has). If they pass the break test and remain in the village, roll a second dice – on a 4+ the fire has been extinguished or has burnt itself out.

Brigade Morale (p.97 Black Powder)
A brigade will break (and is removed from the table) when more than half of its non-Shaken combat units are destroyed. Small units and artillery are ignored for this purpose. To make this calculation players add up the number of non-Shaken units in a brigade to determine the brigade’s strength, and compare this to the number of destroyed units.

Death of Commanders (p.86 Black Powder)

A commander that is killed in combat is replaced by a commander with a Command rating of “7”.


Lastly
For further consideration the Blenheim to Berlin blog also has some Black Powder house rules posted, and I may add links to further lists of house rules for Black Powder as I come across them.

Thursday 10 October 2013

Battle of Leipzig 1813 - 2013: East Flank

Following on from my last post detailing our New Zealand refight of Leipzig, here's an account my Cavalry Corp in this action. As listed in a previous post, 2nd Cavalry Corp consisted of the following:


II Cavalry Corps: GdD Francois-Horace-Bastien Sebastiani de la Porta

2nd Light Cavalry Division: GdD Nicolas-Francois Roussel d'Hurbal
1x Lancer, 1x Chasseur, 1x Hussar

4th Light Cavalry Division: GdD Remy-Joseph-Isidore Exelmann
2x Chasseur, 1x Hussar

2nd Heavy Cavalry Division: GdD St. Germaine
1x Carabinier, 2x Cuirassier


The Action

In which General Sebastiani avoids Lancers but meets Cuirassiers...

I was ordered to occupy the allied forces in this sector, pressing their flank and forcing them to commit reserves. Essentially my attack was to be a diversion from the main action.

Thus obliged, my Corp advances rapidly upon the enemy position, led by the light cavalry. The allied flank is defended by the Prussian Reserve Cavalry consisting of 2 Cuirassier regiments, a Landwehr Cavalry regiment, and a Horse Artillery battery. Immediately the Austrians detach two infantry regiments to support them, and 5 Russian Cossack regiments also arrive to threaten my left flank. 

The 4th Light Cavalry division charges the enemy immediately, pinning one of the Austrian infantry regiments in square where my Horse Artillery battery starts to take a heavy toll on them. This Austrian square also blocks return fire from the Prussian guns. My Heavy Cavalry division advances, and I send a request for infantry support.  

The 2nd Light Cavalry division charges the Cossacks, who choose to hold as they are defending a river bank. My Lancers distinguish themselves by riding down two regiments of Cossacks before retiring to reform, but my Hussars disgrace themselves in this encounter and retire, though still in some order. Admittedly the Hussars were assaulting across a river, and the enemy had both rear and flank support...


Prussian Cuirassiers move to oppose and I charge with my own Cuirassiers. A disaster unfolds as the Prussian Cuirassiers cause mine to retire, and then pursue into my supporting Carabiniers who break in the confusion! At least the Carabiniers were facing other heavy cavalry, rather than the ignomy of fleeing from Hussars as happened historically... small consolation! I am now on the back foot, down a Cuirassier regiment equivalent. An Austrian Division of a Cuirassier and Dragoon regiment arrives to reinforce the allied position and I now have 2 Cuirassier regiments versus 3 enemy Cuirassier regiments.

In the following turn my Cuirassiers charge again, breaking a Prussian Cuirassier regiment and then retiring to reform. Things even up again. My units are fatigued from the constant action but their Generals rally them successfully. The second Austrian infantry regiment takes the town of Hirshfeld and fires upon my nearby cavalry. My Horse Artillery disorders the other Austrian infantry regiment which is still pinned in a square by my cavalry.

On the next turn there is another setback, as the surviving Cossacks have got around behind my position. They charge into the rear of a Chasseur regiment from 4th Light Cavalry division and break them! 

I charge some Prussian Landwehr Cavalry with a Cuirassier regiment, but this is another embarrassing action by the French, and both sides retire after an inconclusive combat. An Austrian Hussar regiment joins the allied forces but refuses to advance. Two regiments of French provisional infantry arrive through the woods on my right flank and occupy the Austrians here. However I am aware that these militia will be of limited help to me, especially as yet more Austrian infantry is moving to intercept. I retire my regiments to rally and deal with the accursed Cossacks that are still causing a nuisance. 

I finally receive reinforcements in the form of a Dragoon Division of 3 regiments... hurrah! However they promptly misinterpret orders and head off in the wrong direction for a turn - Merci!

Unfortunately the allies reinforce with a Cuirassier Division of 2 regiments and another Horse Artillery Battery. They move to join the Austrian Hussars who have been disobeying orders until now, and all of them advance upon my position. The pressure is slightly relieved when they too misinterpret orders and spend a turn retiring rather than advancing!

A disastrous sequence of events then unfolds as a Prussian Cuirassier regiment breaks one of my French Cuirassier regiments (hardly surprising given their previous display against the Prussian Landwehr cavalry).  The same fate then befalls the Hussars of 4th Light Cavalry Division as they are attacked by Austrian Cuirassiers.  The enemy Cuirassiers are spent in these engagements and retire shaken, but two of my three Divisions are now broken and will be forced to withdraw!

Meanwhile the Cossacks are finally driven off with a whiff of cannister from the Horse Battery, and a decisive moment arrives. General Sebastiani personally leads the Hussars of 2nd Division in a glorious charge against a shaken Prussian Cuirassier regiment. If successful this action would break Prussian Reserve Cavalry Division.  The charge goes badly wrong however, the Hussars are beaten off and General Sebastiani suffers a serious wound and is forced to retire from the field! 

My Horse Artillery opens fire and the Prussian Cuirassiers and their Division finally breaks. I throw the fresh Dragoon Division into the fray against the fatigued Austrian Heavy Cavalry Division and drive them back, but my Dragoon Division is also exhausted by this engagement.

At this point five of my six remaining unbroken regiments are shaken, Sebastiani is incapacitated, fresh Austrian Cuirassiers are arriving, and the situation is looking grim. I order the retreat while I can rather than having another two divisions break and the situation turn into a rout. The allies are left in possession of the field!  Quelle catastrophe!

Congratulations to Tim and Paul who commanded the allied forces in this sector! Had I some infantry support I could have accomplished more I think, but it was needed elsewhere in the larger scheme of things.


Reflections on Rules

The Blackpowder rules seemed to give a nice fast and tense game in this encounter. We got the hang of them quickly after having only limited experience of them. They borrow many mechanisms from the old Games Workshop "Warmaster" system, but seem like an improvement, especially with a few houserule tweaks implemented by the organisers. The command tests create a much needed fog of war effect without time consuming complexity. The combat matches well enough the historical accounts I have read of cavalry actions of this time, with the cavalry charging and then retiring to rally before charging again. Divisions gradually became ineffective as regiments are shaken, disordered, or implode in rout. 
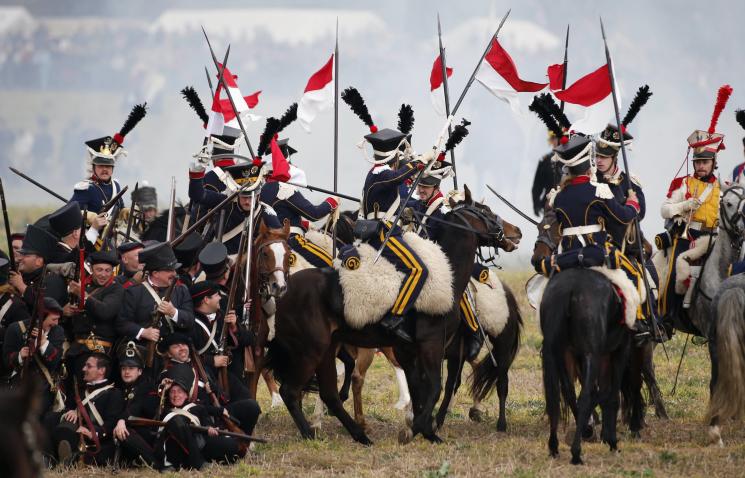
Cuirassiers are very fearsome, but not to the point that they become invincible against Light Cavalry as I discovered (damned Landwehr!). Cossacks are not to be sniffed at either if they get behind you and I'll be less contemptuous of them next time. We wondered if Horse Artillery might have been a touch overpowered in its ability to redeploy and fire so effectively - but perhaps not given it was able be unlimbered and firing in less than a minute as I understand it. Anyway,  great game and I look forward to the next encounter!